Creating a new borehole log in Drillysis Windows App is a very easy process. It can be done in four easy steps and your log will be ready to enter your investigation data.
1 General – 1st Step
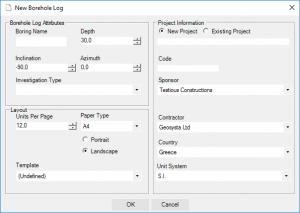
Click on New icon on the toolbar or File → New (Ctrl+N). The New Project window appears.

In the “Borehole Log Attributes” box of the window insert the general information of the borehole (name, type, depth, inclination, azimuth)
In the “Layout” box of the window insert the general information of the log representation (page size-orientation, units of depth per page, select a template).
Each borehole must belong to a specific project. In the “Project Information” box insert all the information (name, code, sponsor, contractor, country, unit system) of the new project – in case the borehole refers to a new project – or select the desirable project from the list of the existing projects.
The Borehole Log is created and the Depth column is by default added.
2 Edit Page of Log – 2nd Step
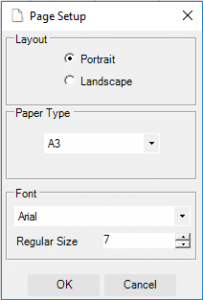
The layout of the log page has been already defined at step 1. However, if the user wants to edit the layout representation then:
Right click anywhere on the page → Page Setup or File → Page Setup. The Page Setup window appears.

To change the background color of the log, right click anywhere on the page → White On Black / Black On White.
Edit Header – 3rd Step
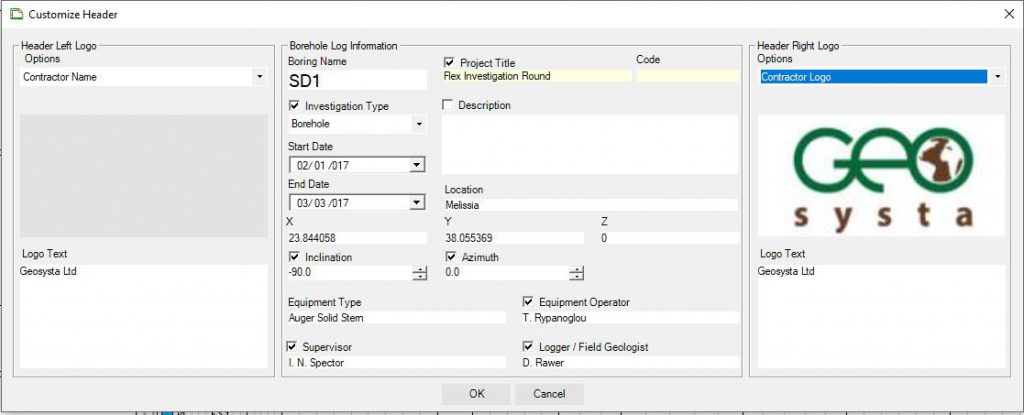
Double click on header or click on Header icon on the toolbar or Edit → Header. The Customize Header window appears.

“Header Left/Right Logo” box: Choose from the Options what to show on the left/right side of the header. Contractor’s logo-name, Client’s logo-name, browse a custom logo and edit its text. The Contractor’s and Client’s logo-name can be by default options that have been already saved into the project (via web source).
“Borehole Log Information” box: The fields regarding the borehole and its project that have been already defined at New Project window are already filled but can also be edited here (except the project info). Some of the information are by default shown at the header of the log (boring name, date, coordinates, drill type). The rest can only be visible by marking their box.
4 Insert Columns – 4th Step
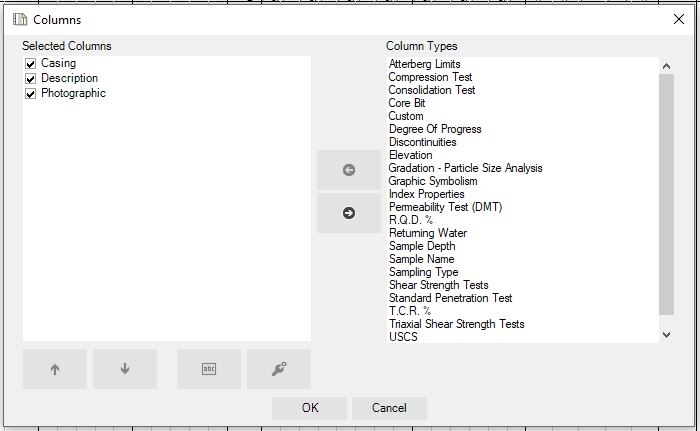
Click on Column icon on the toolbar or Edit → Column. The Columns window appears.

Select from the Column Types list the column types to be shown on the log and move them to the Selected Columns by clicking the left arrow. The most commonly used column types are listed, but in case a desirable column type is not listed the user can create it by using the Custom column type.
All the columns listed into the Selected Columns box have been added to the log. If a column must be deleted, then select the column and click on the right arrow to throw it back to the Column Types box. If a column must be invisible in the log but keep all its data, then just remove the check mark next to its description.
To change the show column order at the log select the column and move it up/down using the up/down arrows.
The name and the view options (where different view options are available) of a column can be edited by clicking the abc and the tool buttons respectively.
